-
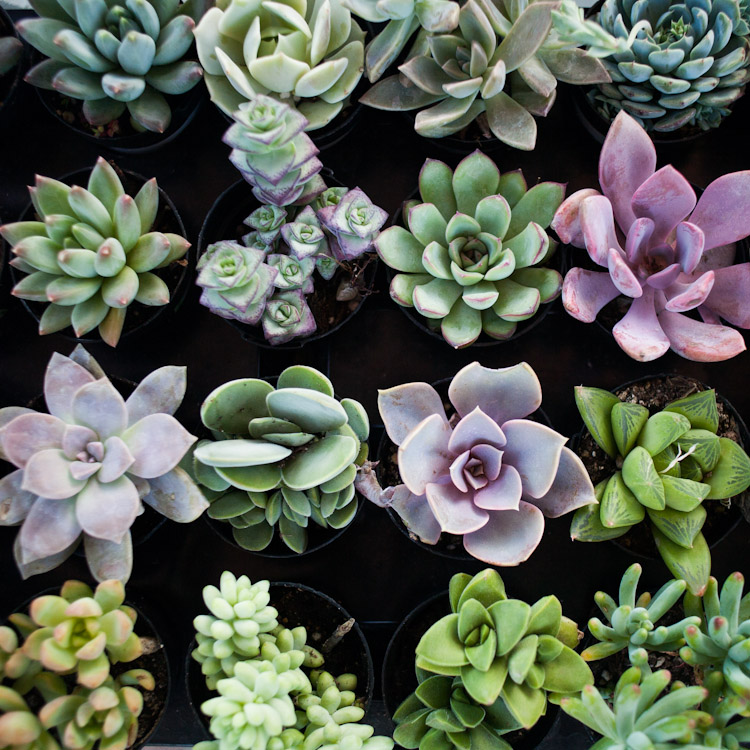
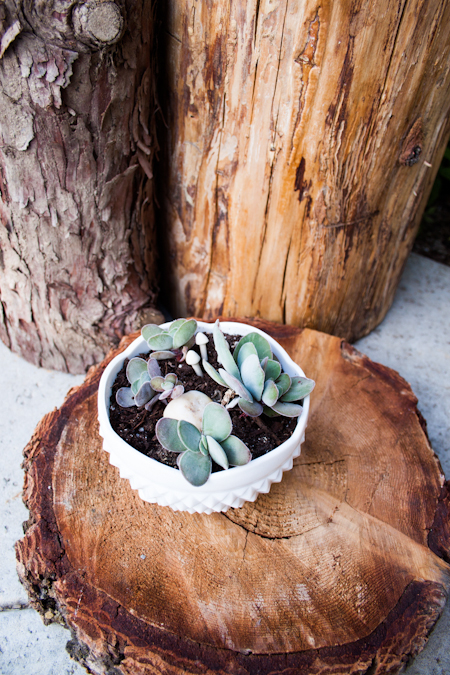
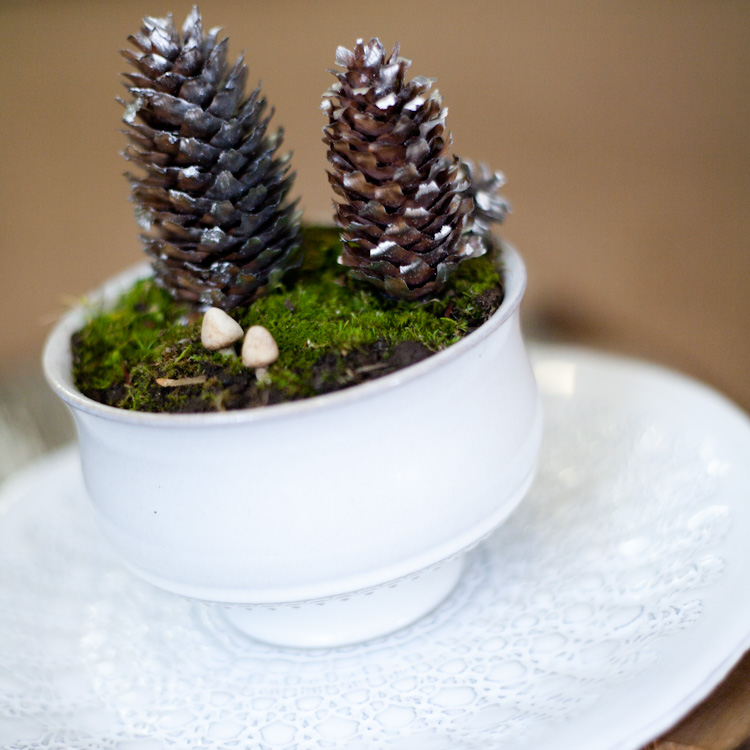
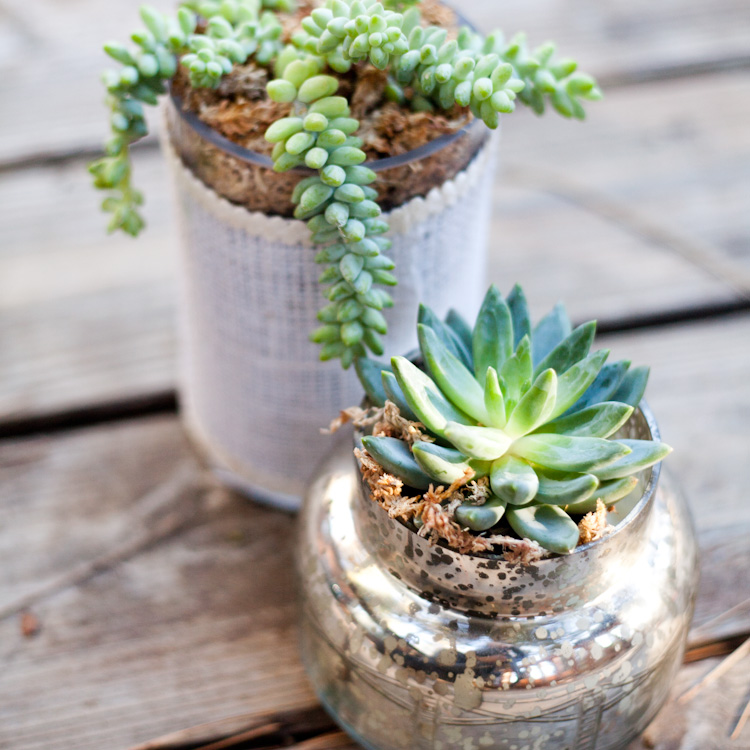
Succulent Garden
Wow, it has been a long time since I posted last. Things have been so busy. I turned 28, yikes! May has flown by so quickly. Summertime is here and because I am living in a warmer climate I can finally plant a succulent garden. I decided that I wanted to start by first getting my current plants to grow a little larger. I bought almost an entire flat at Home Depot. I took several of the plants out of their small pots and moved them into larger ones. This way they have room to grow and I can move them if they need more sun or less. Each succulent…
-
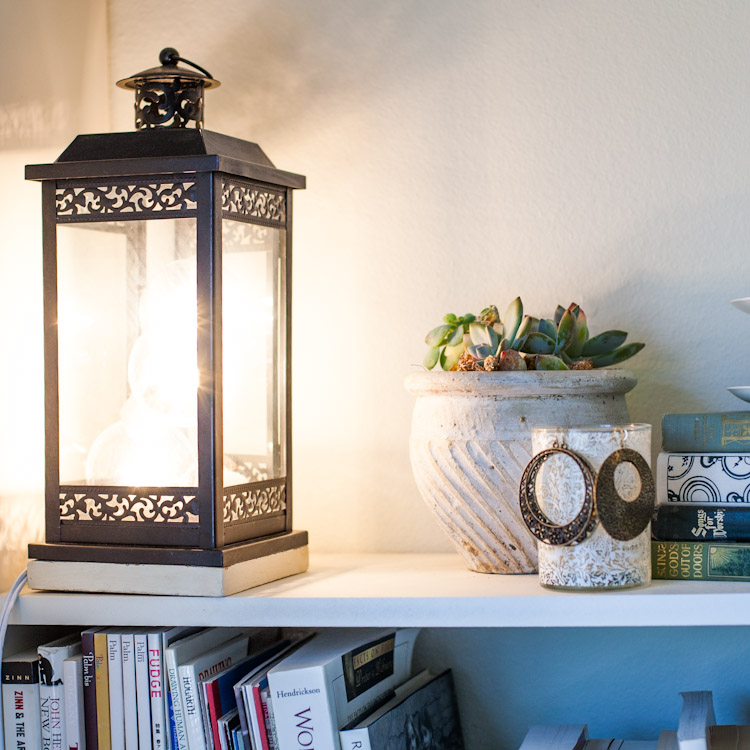
DIY: Lantern Light
I have many candle lanterns and recently when I needed a light for my bedroom I decided to repurpose a lantern into an awesome light. I loved the result so much I decided to share it. I did my first ever DIY on creating a chandelier of mason jars. You can view it HERE. This light was similarly wired only I left much less space between the bulbs. The wire lengths are 4, 6, and 8 inches connecting the bulbs to the main wire. For a much simpler version you can find a slightly smaller lantern and purchase this single free hanging lighting kit. Simply open the door to the…
-
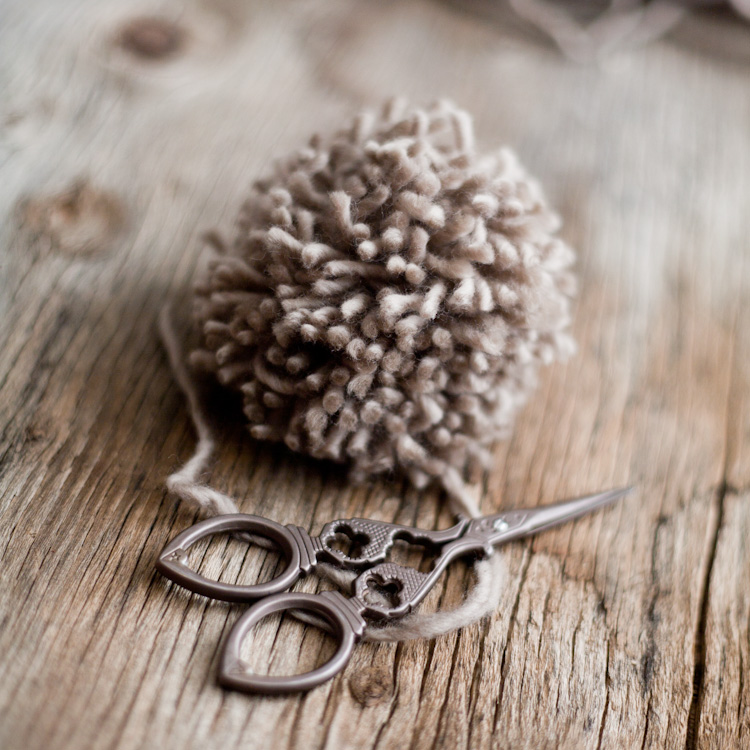
DIY: Pom Pom
For my latest pattern (Reversible Smocking Hat), and for many of my Christmas gifts I had to make a pom poms. I actually have not made pom poms enough before to decide on a way to make them. There are several different methods. Here is what I tried first. https://techknitting.blogspot.com/2008/05/how-to-make-pom-poms.html or https://garnstudio.com/lang/us/video.php?id=95d This tutorial is great but I don’t prefer this way, mostly because I get bored threading the yarn through the center of the cardboard ring. You can purchase a pom pom maker like this one sold on amazon.com: https://www.amazon.com/Clover-Extra-Large-Pom-Maker/dp/B001CE38QQ Here is how I do it. I prefer making pom poms this way because it requires nothing more than…
-
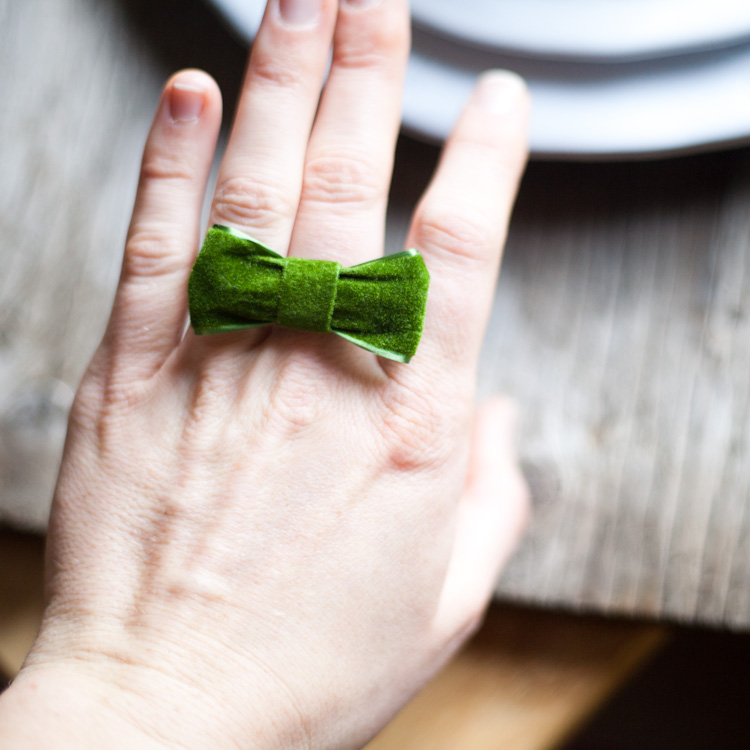
DIY: Bow Tie Ring
Every once and a while…well probably more than that I have an idea which seems a little absurd. This is one of them. The result was a really great bow tie ring. You could use the tutorial for the bow and make a clip or a hair tie also. Supplies: Glue Gun 8 inches of ribbon (more or less depending on the size of the bow) 2.5 inches of elastic 1. Cut ribbon into one four and a half inch length and one two inch length. 2. Fold the larger length of ribbon over like so. The narrower length can either be folded in half length wise or in thirds.…
-
DIY: Princess Skirt
My daughter Fiona is two and a half and crazy about dressing up. She manages to look as if in costume in her regular clothes, due to her pairings and color combinations. I adore her creativity and wild personality. For Christmas I decided I would make her a dress up box…well I didn’t make the box actually, I made what was in it. I thought I would post a quick tutorial on how to make this adorable princess skirt out of tule. It really is so simple and all you need is a sewing machine, 2 yards of tule, scissors, 16-25 inches of elastic and a safty pin. So…here we go.…
-
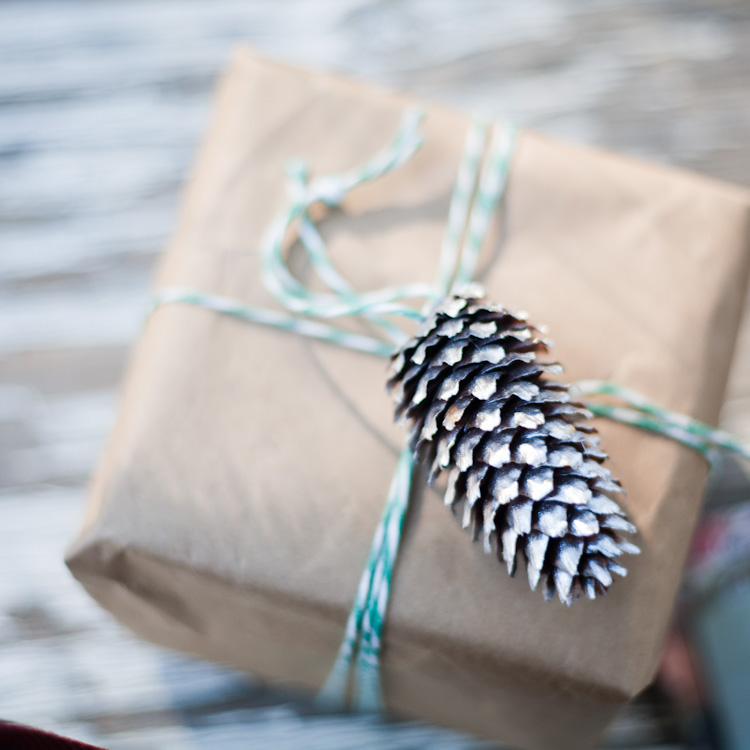
DIY: Gift Wrapping (part 1)
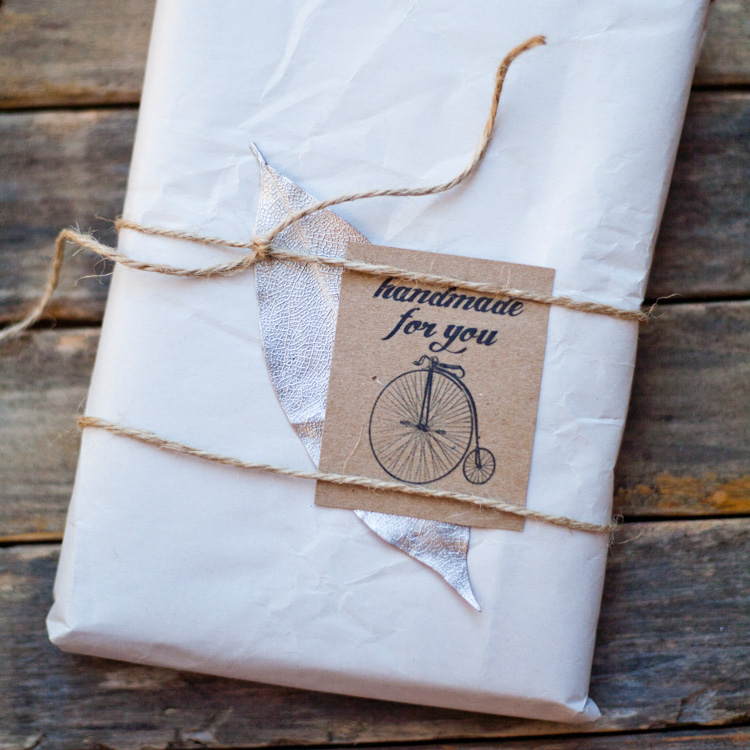
Using this free download you can inexpensively (and easily) wrap gifts for the holidays. Check out this tutorial for how you can make these tags out of brown paper grocery bags. Also see below for a tutorial on how to tie up your gifts a little differently. I love twine! Wrapping like this is easy I used old paper from Anthropologie that was used to wrap up some bowls I purchased. Here is a little photo tutorial on how to tie your gifts like this. Wrap some twine around the front of your gift and then flip it over. Twist the twine together until it you have around two inches…
-
DIY: Braided Bohemian Headband
Another headband tutorial! Be sure to check out the Single Strand Lace Headband and Double Strand Lace Headband. For this tutorial this is what you will need. Materials: 20 inches of three types of lace or ribbon. You may want to double up if one of your strands of lace or ribbon is significantly narrower than the others. As you can see in the picture I used two strands of the narrowest type of ribbon to even out everything. Scissors 2.5 inches of elastic Sewing Machine (glue will work also) EXTRAS: If you want to make the flower extras you will need. A silk flower, a button, some extra ribbon,…
-
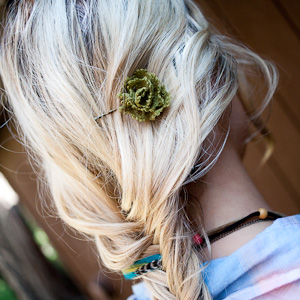
DIY: Bohemian Chic Hair Pin
Yet another DIY! Summer is a time to create and when summer hits I definitely put down my knitting needles a bit more…THE HEAT! It is hard to knit with even the softest wool fiber when it is close to the triple digits outside. So here is a fun tutorial for those of you who are taking a breather from knitting. This clip was designed using a button off one of my old sweaters and some feathers I already had on hand (from all the feather extensions I have been putting in). If you purchased feathers for feather extensions and you have some left this is a great project to use…
-
DIY: Peacock Feather Earrings
I posted some pictures of peacock feather earrings I made a while back. I thought I would do a tutorial for how to make them so if any of you are up for a fun summer jewelry project. I saw these a while back at Anthropologie for 40.00 or so. They only cost a couple of dollars to make which is more in my price range. Materials Needed: 1. Jewelry Pliers 2. Peacock Feathers 3. Earring Hooks 4. Crimp Ends 5. Scissors You should be able to find all of these supplies at your local bead or craft store. If you can’t I included links above. The peacock feathers come…
-
DIY: Feather Extensions
So the long awaited post is here! Time to “Do it Yourself!” No need to pay the steep prices for getting feather extensions in. Feather extensions can be washed curled and flat ironed. Just do whatever you already do with your hair they are very easy and fun. They can last up to six weeks. This tutorial will show you how to do it yourself. Have fun! Materials Needed:1. Jewelry Pliars (the kind with the teeth are best because you can use them to take the feather extensions out once you are done with them.) 2. Micro Crimp Bead (the pictured clip has silicone in the center, this helps it…